|
The Total Solar Eclipse of 1999 from Hungary
by John Wilson
How the photographs and animations are created: |
|
| Total Solar Eclipse |

|
|
Photographing the 11 August 1999 eclipse from Fonyod
This is the story behind the total solar eclipse pictures and animations on
show in the Gatley Gallery
"virtual planetarium"
and it describes how, using relatively simple inexpensive
equipment, one of nature's finest light shows can be captured on colour film
then enhanced or animated using a PC.
Maps courtesy of MapQuest.com Although this eclipse was theoretically visible from the south west of the UK, weather prospects were not judged to be very good, so an ideal excuse was provided for a week abroad. Our decision was born out by events, few people, unfortunately, saw totality properly from the UK. Indeed the weather across Western Europe was somewhat unsettled all week despite hot sunny days in Budapest on the days leading up to and following the 11th. 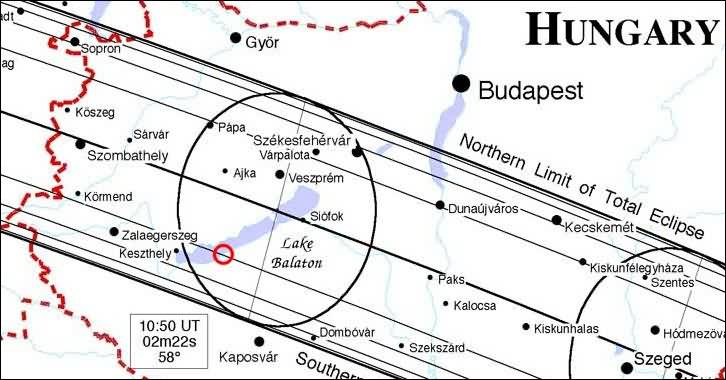
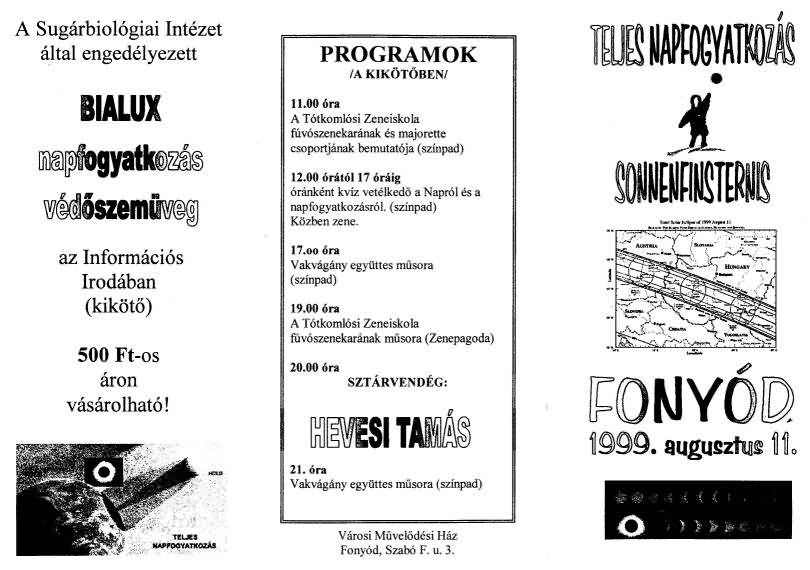
Eclipse map courtesy of Fred Espenak, NASA/Goddard Space Flight Center To add to the drama on eclipse day, when we arose at 5am to catch an early morning Intercity train, we were greeted by unaccustomed cloud over the city. As we travelled south west on the train it became worse with dismal grey clouds and rain for about an hour (just like home in Manchester in the north west of the UK). 
Blue sky only started to appear as we drew level with the north-east tip of the lake but by the time we reached the small lakeside resort of Fonyod (Lat 46 o 45' N, Long 17 o 34' E) a magical transformation had taken place and the sun was again shining and the clouds were thinning out. Since the width of the totality zone was only about 100 kilometers, the eclipse duration here was reduced to 2 minutes (22 seconds less than on the eclipse "centreline" which crossed crowded Siofok). We decided to stay, however, having found a very pleasant lakeside vantage point.
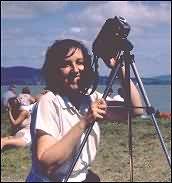
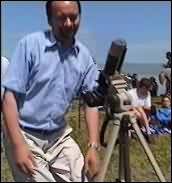
Camera Equipment Our simple equipment consisted of an ordinary camcorder and an old Pentax Spotmatic SLR (made in the late1960's) with a 300mm Dallmeyer Dallon f/7.7 ex-RAF WWII gun camera lens and an ordinary cheap 2x converter. The whole thing was held together with a home-made arrangement using bits of tin can and a commercial macro extension bellows attachment. This amazing lash-up gave the equivalent of a 600mm focal length f/16 telephoto and could easily be packed into an ordinary camera bag when dismantled. The only other equipment needed was a cable release, filters (see below) and a sturdy lightweight tripod. 400 ASA Fuji colour transparency 35mm film was used for all the still shots.
There are, however, simple precautions which make looking at the partially eclipsed sun through camera viewfinders perfectly safe. We used special Baader Astrosolar filter material to protect the equipment and our eyesight during the partial phases. This is a hi-tech silvered plastic film which must be cut into suitably sized circles and securely fixed over the camera lens or binocular objective lenses. Never try to fit filters to the viewfinder or eyepieces, because the focussed heat rays can melt or crack most filter materials. Thus we were able to safely photograph the approach to totality and view the sun directly using a small pair of filtered binoculars. For naked eye viewing we used approved quality "eclipse glasses". Never use makeshift filters made from materials such as bits of fogged film, few are completely safe. The 1999 Eclipse 
As the eclipse progressed, the quality of the light became increasingly strange and a noticeable chill became apparent. Totality occurred unexpectedly since the corona seemed exceptionally bright. If you get the opportunity in the future, do have a good look during totality with a pair of unfiltered binoculars. It is quite safe to do so whilst the sun is totally eclipsed and well worth missing a few photos for. The sight we witnessed was breathtaking with brilliant pink prominences leaping out from behind the edge of the moon and a corona (the sun's pearly white "atmosphere") visible several diameters away from the sun exhibiting clear magnetic line structures. 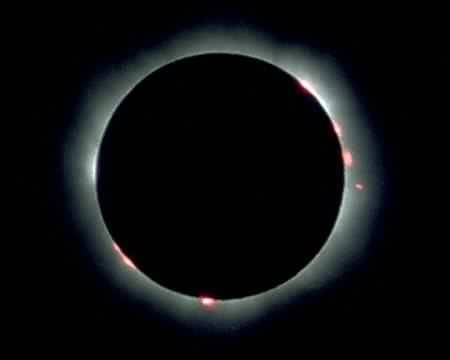
Most photographs do not do justice to the sight. This is because the brightness varies over such a wide range from the prominences and inner corona to the faint outer reaches of the corona. The best one can do is to take shots covering a wide range of exposure times. I took exposures ranging from 1/500 second to 4 seconds, clicking through nearly the full range on the camera's exposure dial between these extremes. You really need a camera that allows manual exposure settings, though an automatic may work but will be unlikely to produce a range of exposures. Similarly auto-focus cameras are not really suitable, though we did get one or two reasonable sequences from our totally automatic camcorder. 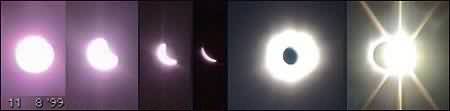
Image Processing The best way to show how the eclipse really looked is to have all your shots scanned onto a CD then use a PC to animate these separate frames. You can combine shots of the partial phases, if you have photographed them using a filter, into a time-lapse sequence.
Alternatively it is possible, with a little effort, to combine a number of exposures of totality into a single image. There are a several web sites such as MrEclipse.com where you can see the results of using graphics programs like Photoshop. 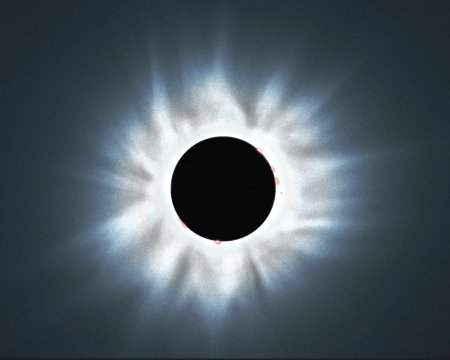
The combination image I produced was made with the help of an excellent tutorial on the Adobe website using Photoshop 4. The combined sequences and animations were made using Jasc's Paint Shop Pro 5 and Animation Shop. Future Total Solar Eclipses I hope that anyone discovering this page might be encouraged to travel to see and perhaps photograph a future total solar eclipse. All you need for successful photography is a camera with manual exposure override, a telephoto lens (at least 300mm, 400 - 600mm better), some colour film, safety filters, a cable release and a tripod. Alternatively just enjoy the view. Full details of past and future total solar eclipses are available on the NASA eclipse website . For more information on all (and I mean all!) solar and lunar eclipses, see Fred Espenak's Eclipse Home Page MrEclipse.com . © 2000 John E Wilson. |
|
|
Site Map | Top |
|